
Leather Edges - Cut or Turned, Raw, Burnished or Painted?
When deciding the most appropriate way to tackle leather edges, there are a lot of considerations, from the type of leather, to the type of product, making time, aesthetics and so on.
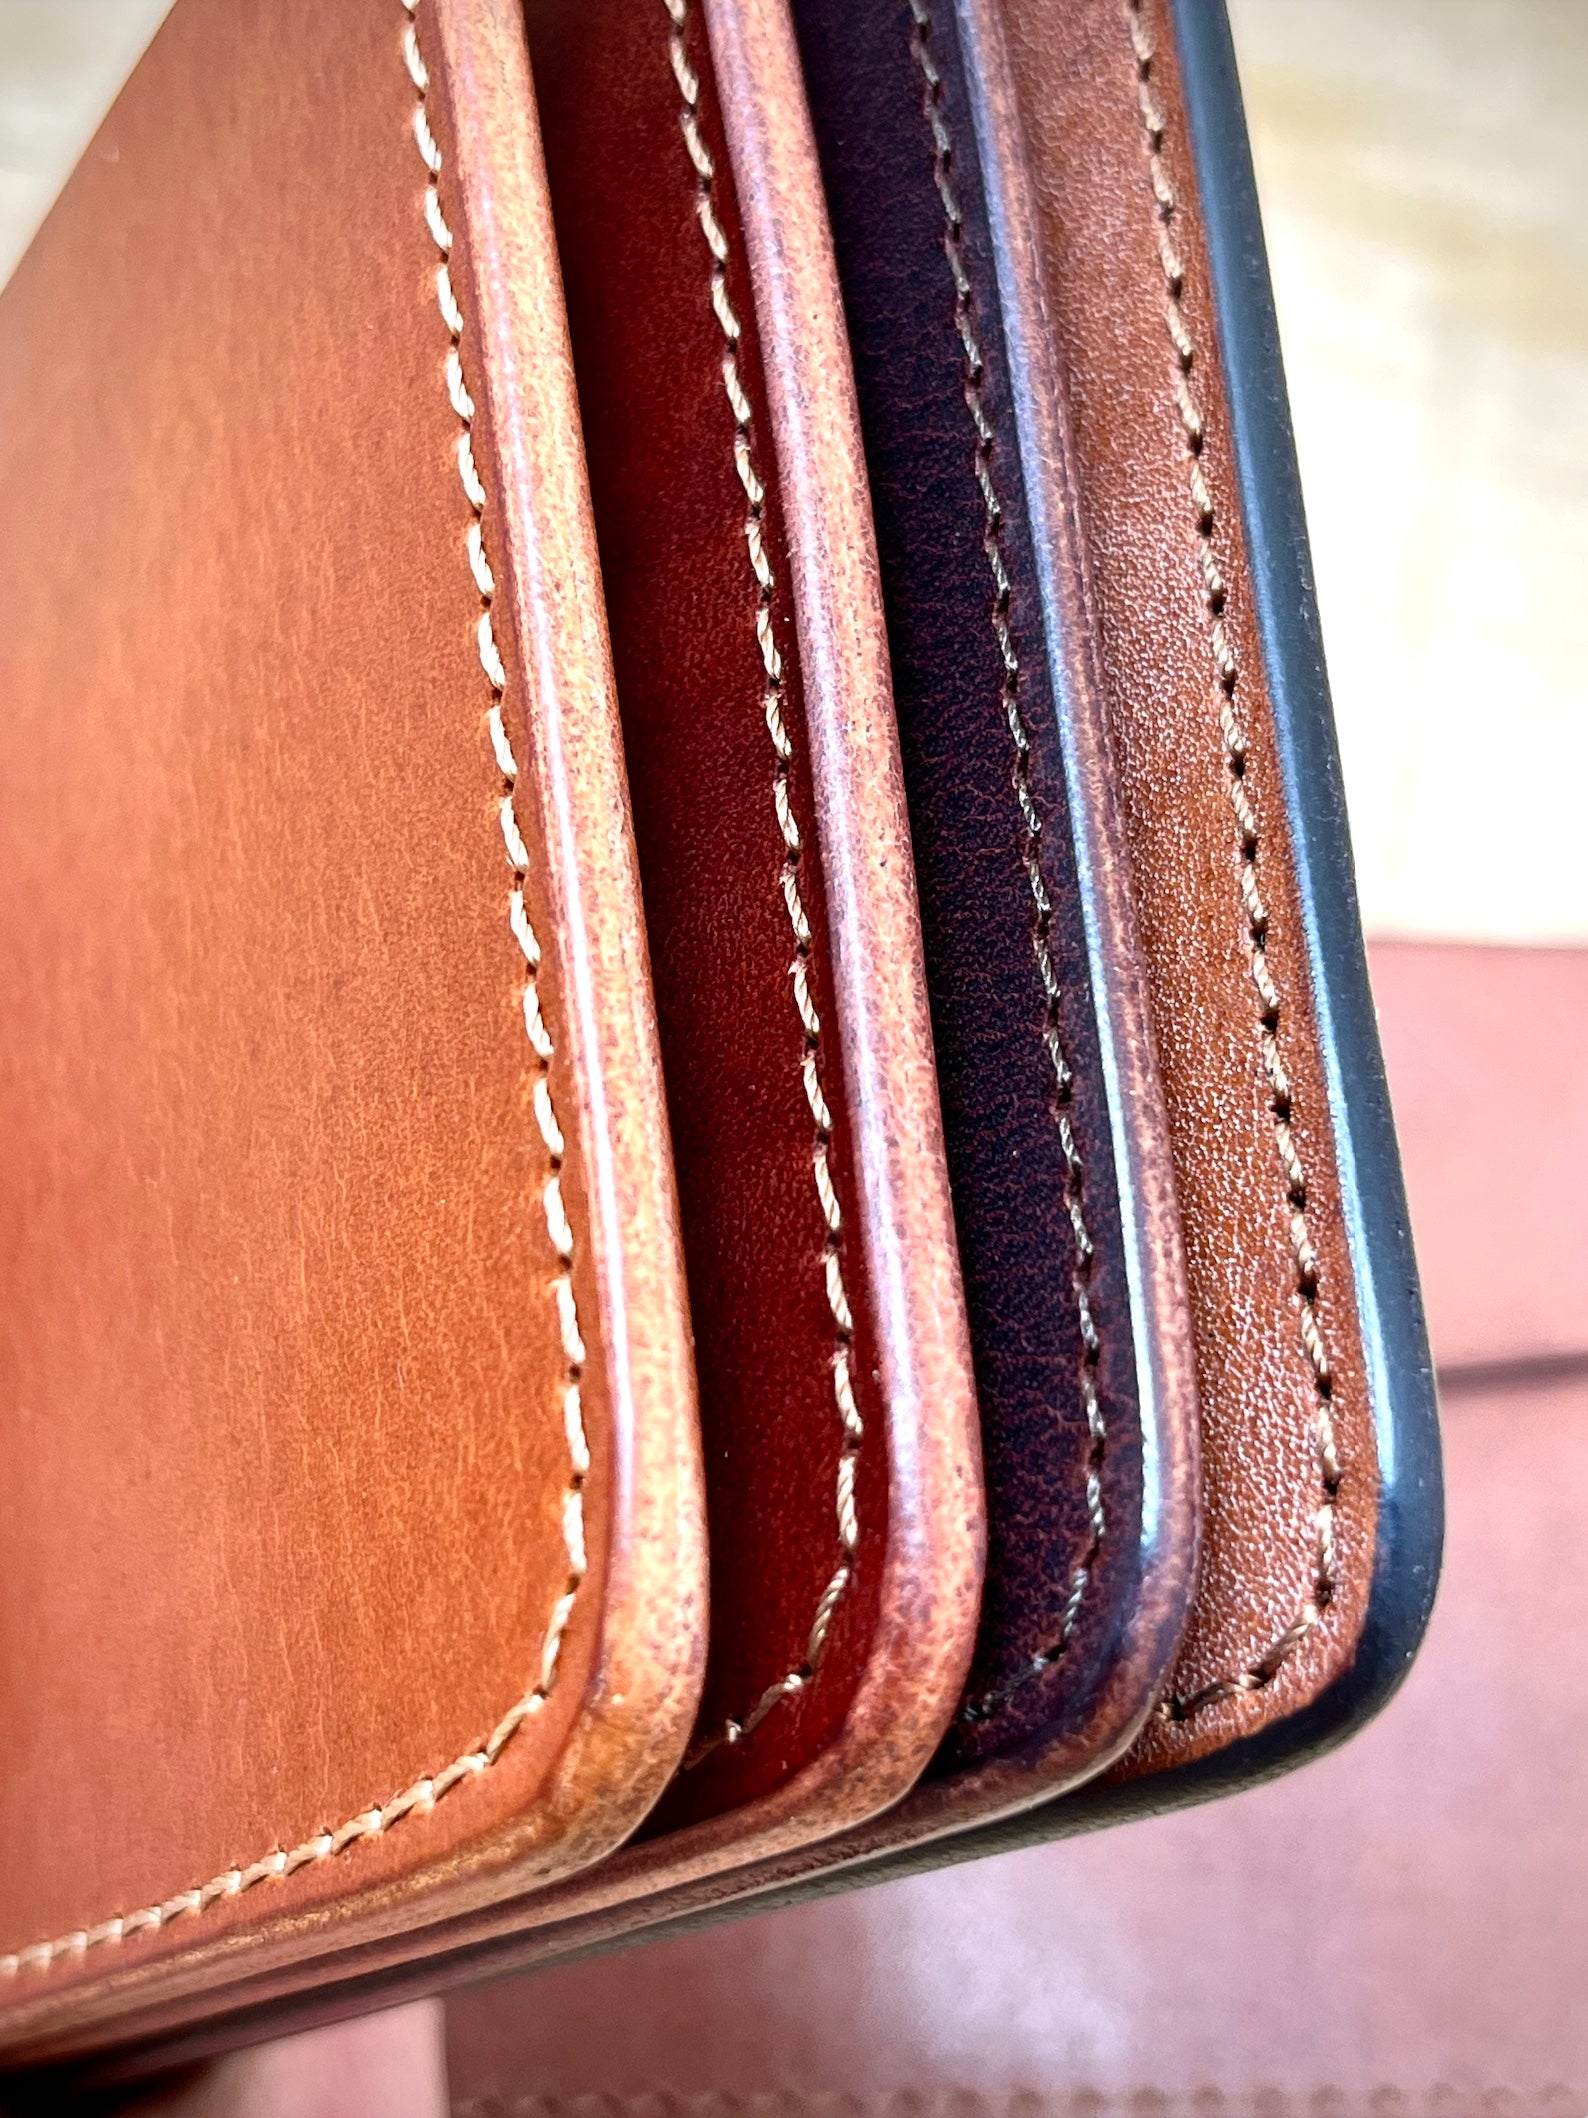
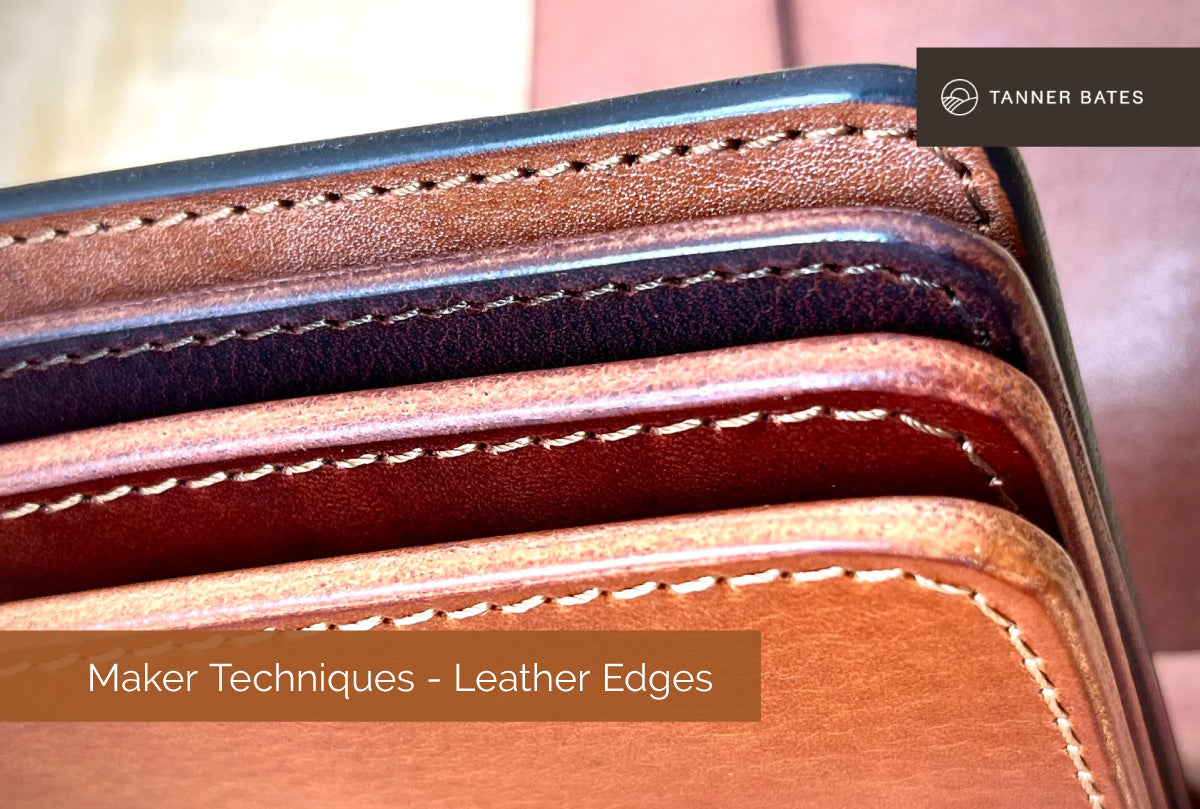
Most of our leather products have a finished cut edge. This is the most traditional and most durable method.
The process of hand burnishing leather edges is time consuming and labour-intensive but can achieve an incredible aesthetic.
In order to be able to hand burnish a cut leather edge, you first must start with a quality, naturally vegetable (or bark) tanned leather. It is not possible to burnish a chrome-tanned leather, and so edges tend to be hidden by a turning process, or covered with edge paint.
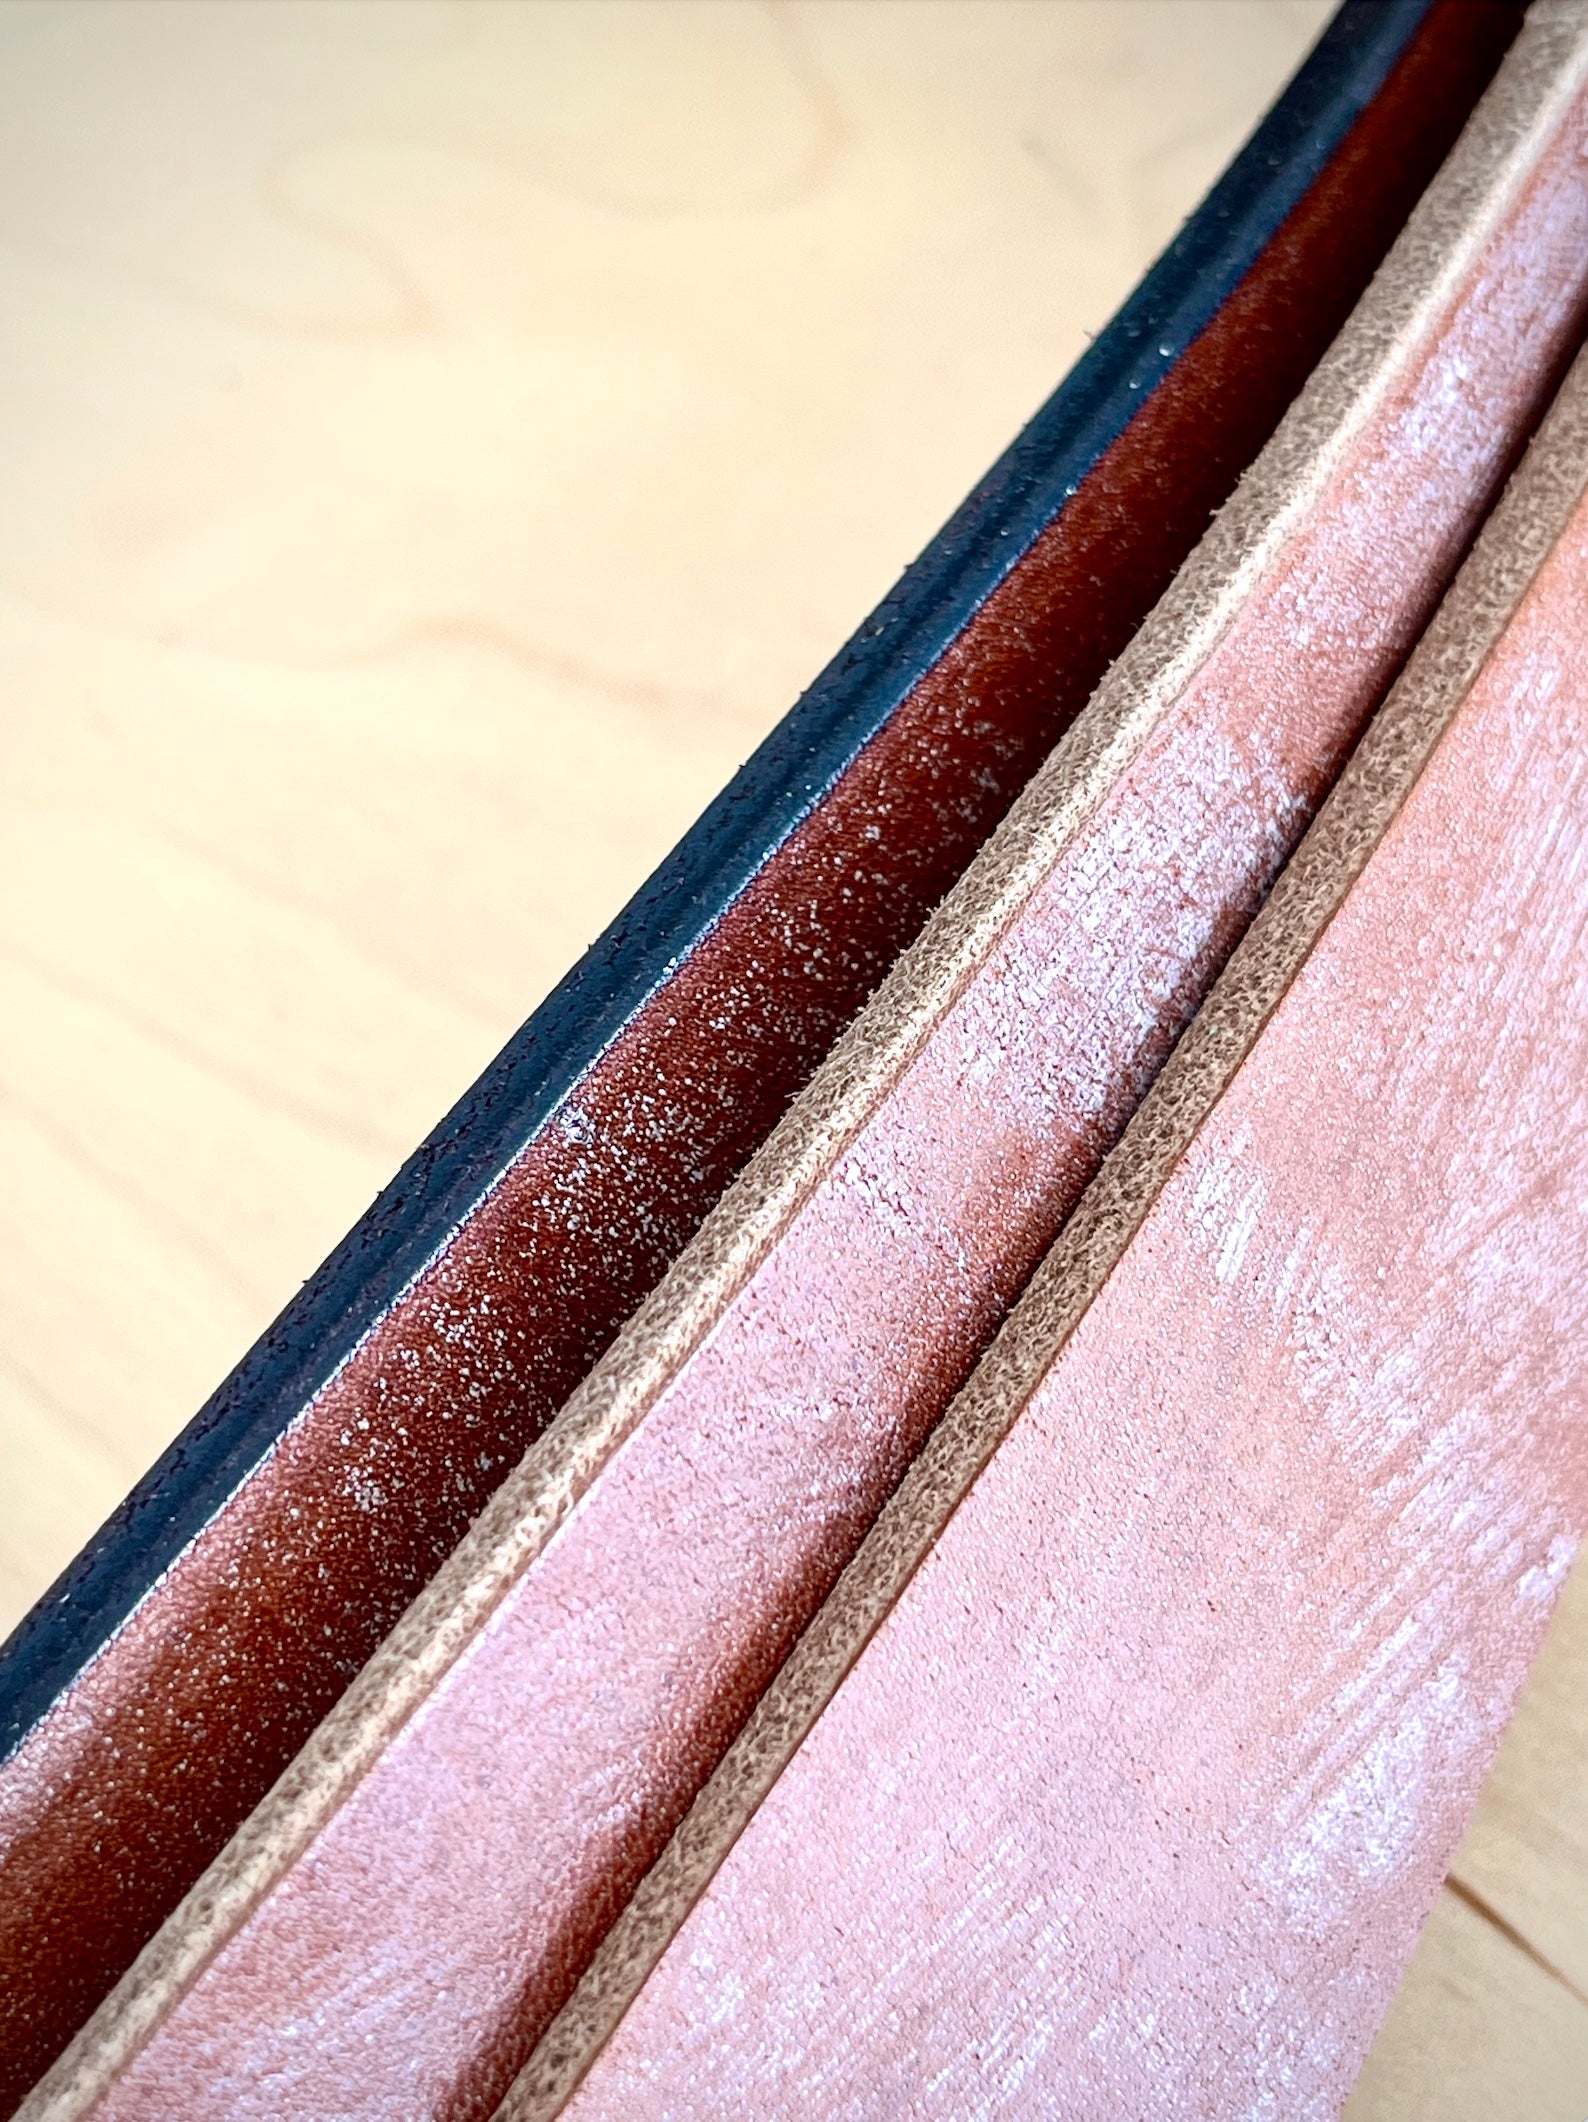
Above: A raw edge, a bevelled raw leather edge and then a burnished and dyed finished edge - three stages our belt edges go through
To create a turned edge, the leather must be thinned down to a wafer thin slither which is then turned to hide the cut edge and stitched. Due to the leather being so thin, the edge can wear through and break over time.
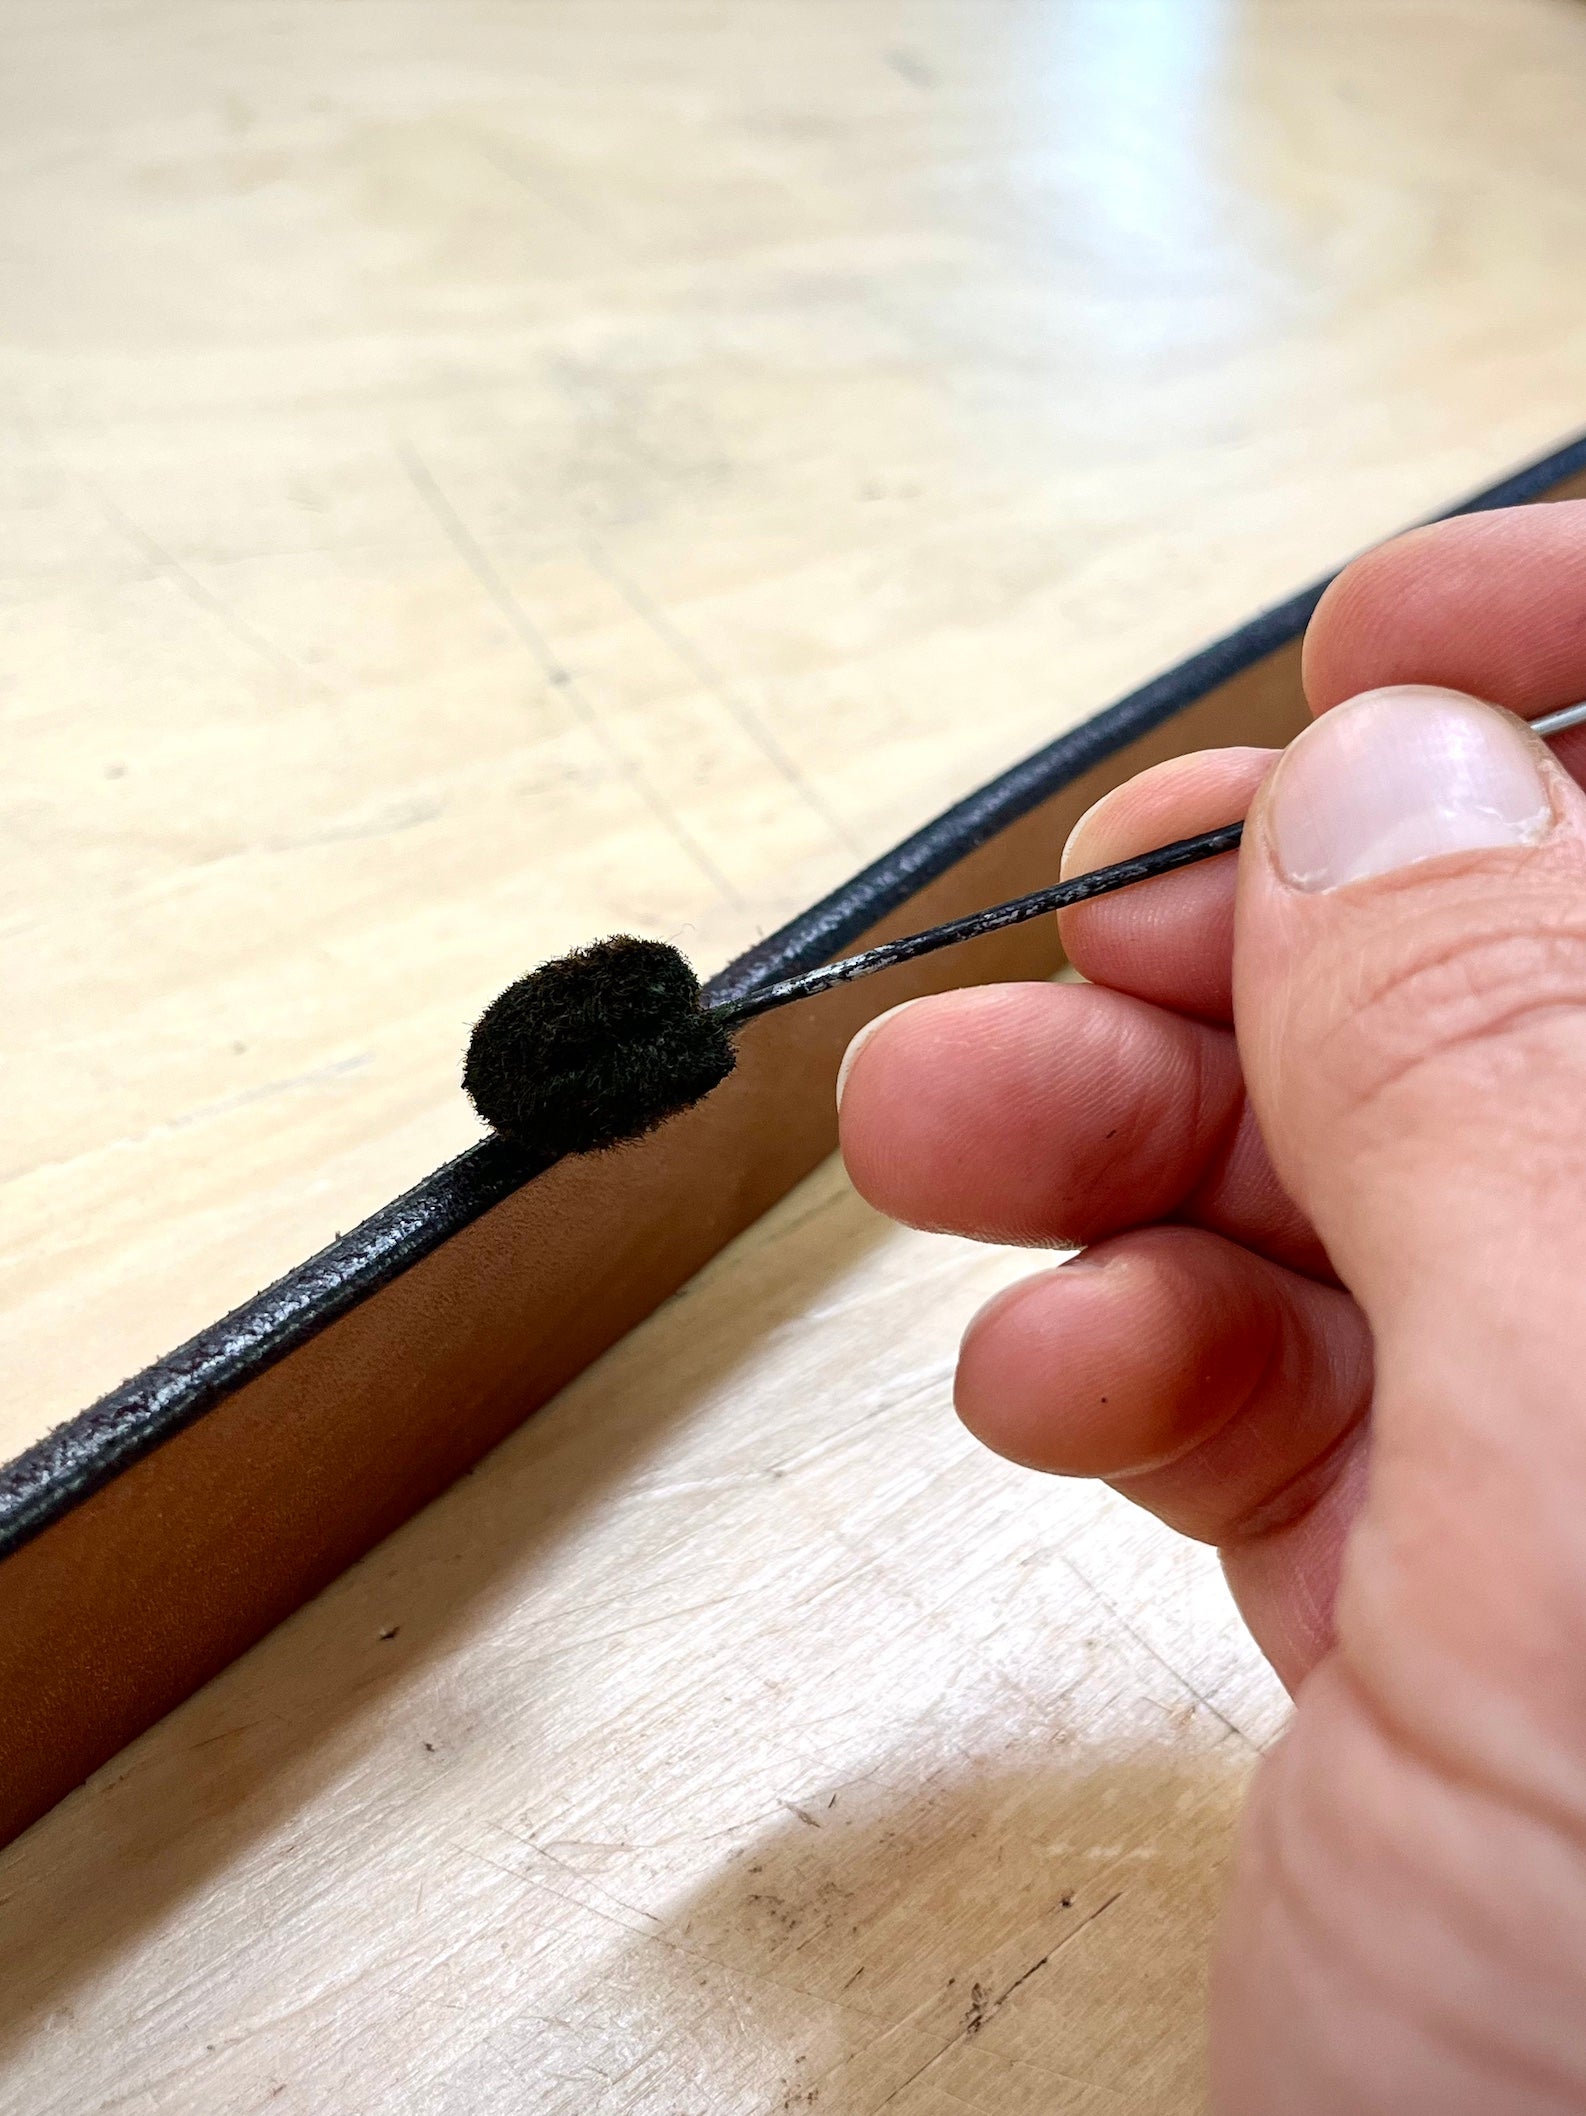
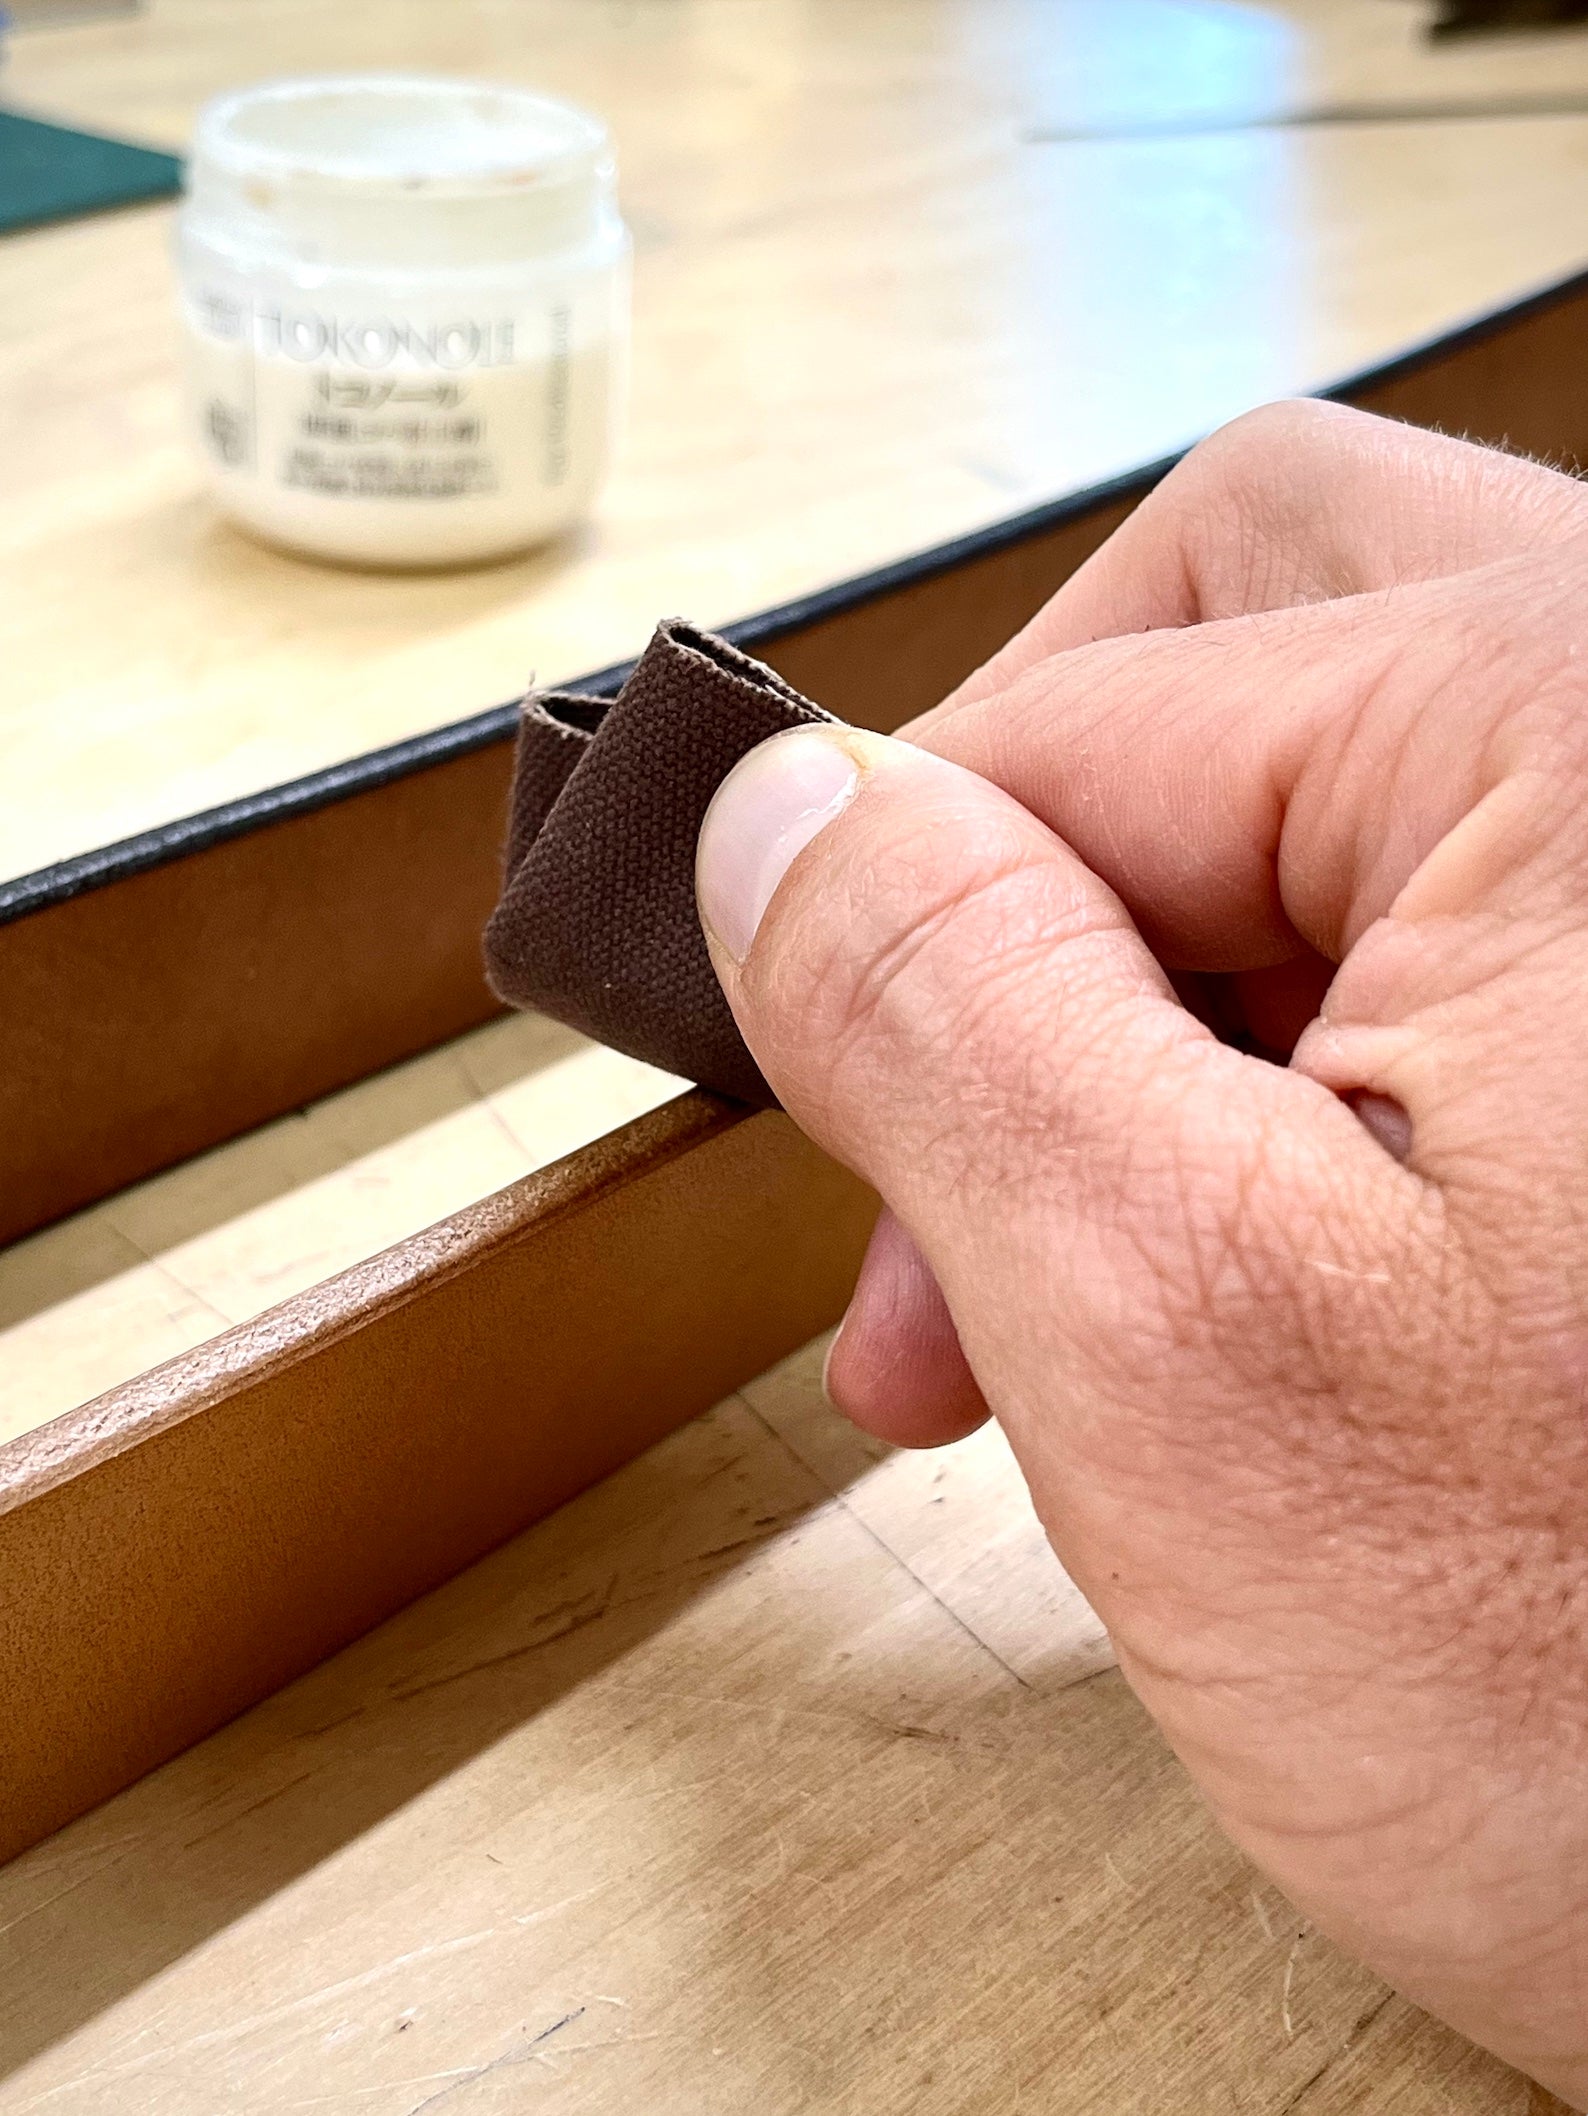
Above: Applying edge dye with a wool dauber
Painted leather edges are a popular option amongst many luxury brands. It is a great way to quickly achieve pristine looking edges and even add a pop of colour to the product. However, if you've ever owned a leather wallet or card holder for example and over time the edge peels off, you'll appreciate that this is not a durable solution to finishing a cut edge.
Above: Hand burnishing a natural undyed oak bark leather belt with a clear edge finish and canvas cloth
Tanner Bates products are made to last, so we leave our leather edges exposed.
The edge can be left raw, or can be burnished either in its natural colour, or dyed. When applying a dye, we opt for either black, brown or a clear edge finish depending on the leather colour being used.
As mentioned, the art of creating perfect hand burnishing edges is probably the most time consuming procedure in making leather goods. There are no short cuts.
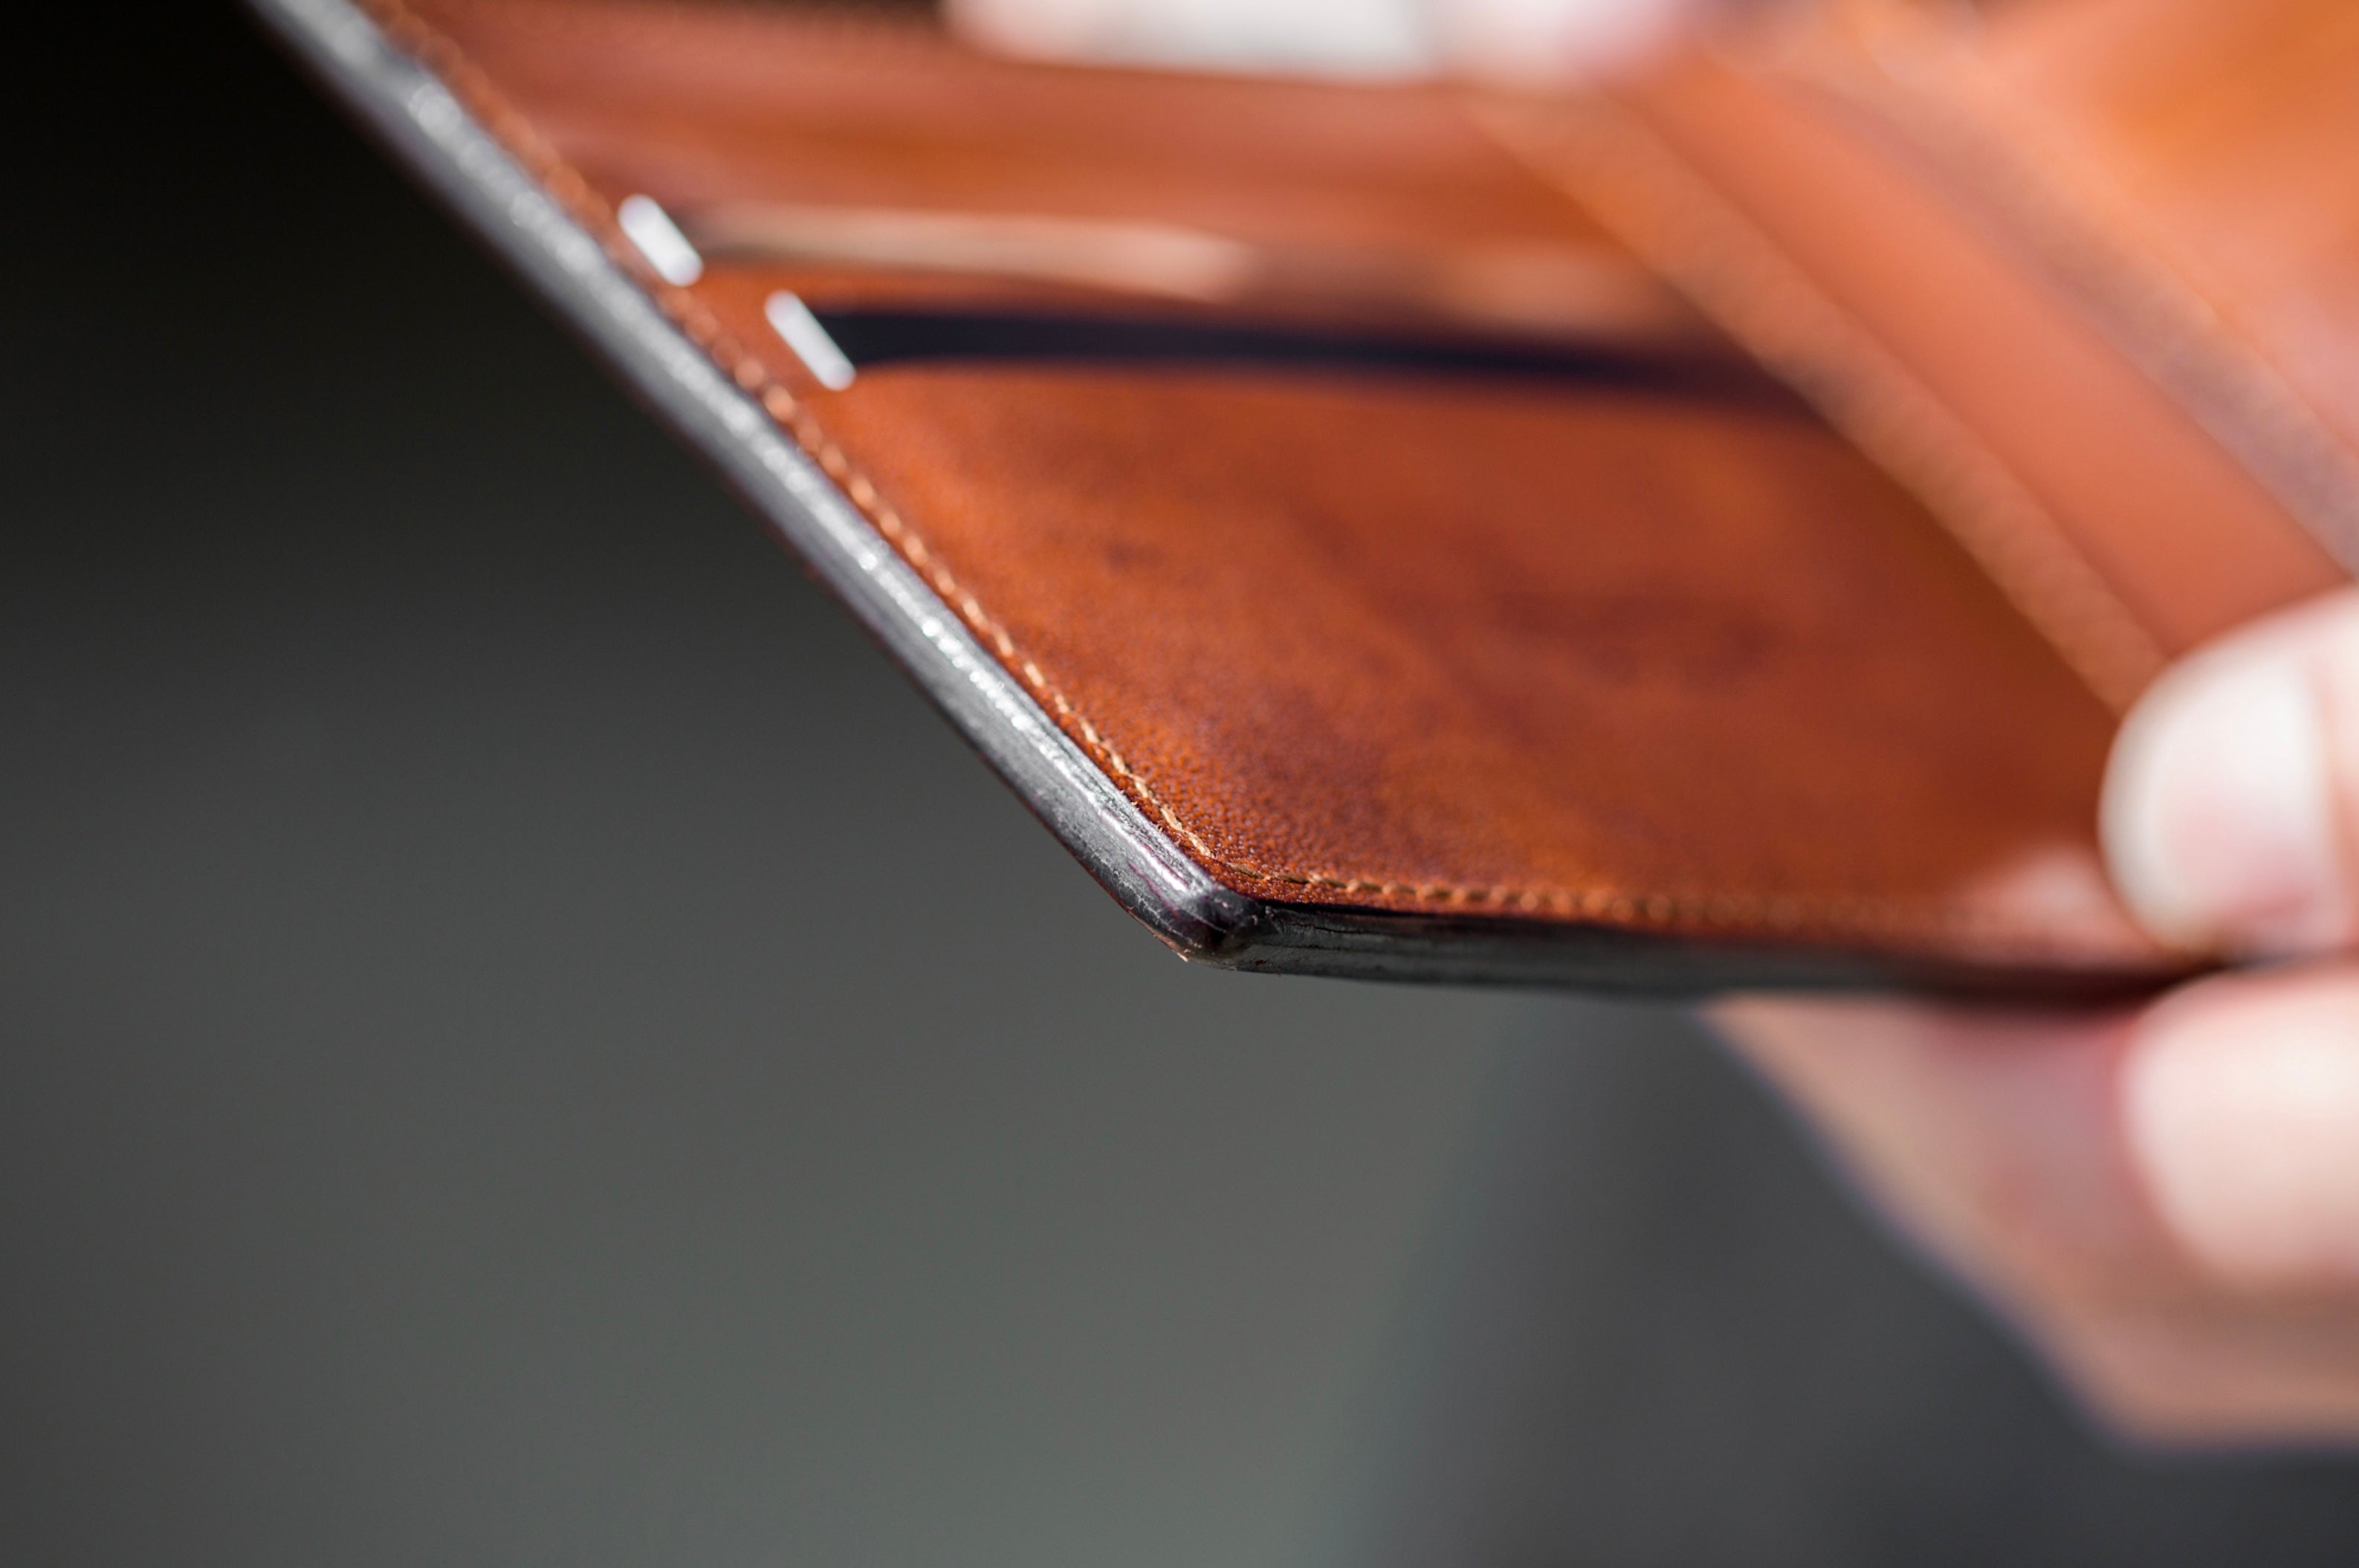
Using our Cut Edge Billfold Wallet for example, starting with the raw cut leather edge, and many layers of leather, we sand with finer and finer emery cloth down to 1200 grit to get a perfectly smooth burnished finish.
It is the act of repeated sanding and burnishing with a canvas cloth smooth the individual fibres of the leather flat until a smooth mirror-like finish is achieved.
We think it is worth the additional effort, and hopefully you do too!
Frequently asked questions:
How to finish the edge of leather?
Leather edge finishing refers to the processes involved at the edge or side or border of a piece of leather. In leather crafting, the cut edge is often treated and finished to give it a neat and durable appearance.
What are the different sides of leather called?
After the edges have been bevelled, they can be further smoothed and polished using sandpaper, burnishing tools and techniques.
Leather edge finishing of a cut edge is a multi-step process that typically involves:
1. Edge Bevelling: This is the process of removing or cutting off the sharp corner of the leather's edge. The tools used for this are called edge bevelers.
2. Edge Sanding: After bevelling, the edge is often sanded to make it
smoother. This can be done using various grades of sandpaper or sanding tools.
smoother. This can be done using various grades of sandpaper or sanding tools.
3. Edge Dyeing: The edge of the leather might be dyed to match or contrast with the rest of the piece. Special edge dyes or regular leather dyes can be used for this.
4. Edge Burnishing: This is a process of polishing the edge to give it a slick, shiny look. It's often done using a burnishing tool and some sort of lubricant like water, gum tragacanth, tokonole or beeswax.
These steps, especially when done by hand, require a good deal of skill and practice. The quality of the edge finish can significantly affect the overall look and quality of the finished leather product.
What are the different sides of leather called?
Leather has two distinct sides:
1. Grain Side: This is the outermost layer of the hide which was originally the exterior skin of the animal. It's also often called the "hair side" as it's where the hair would have grown. The grain side has a smooth texture and is more durable and resistant to water compared to the flesh side. When the grain side is left completely intact, it is referred to as "full-grain" leather.
2. Flesh Side: This is the innermost layer of the hide that was originally against the animal's flesh. The flesh side is typically rougher and looser in texture. When leather is split into multiple layers, the layers other than the top layer (which is the grain side) will show the flesh side on both surfaces. These types of leather are often referred to as "suede" or "split leather."
Note that during the tanning process, the leather may undergo various treatments that can alter the appearance and texture of both sides. For example, the grain side might be buffed or sanded to remove imperfections, and the flesh side might be treated to make it smoother or to give it a different texture, a process sometimes known as ‘mossing’.
What is the best sandpaper for leather edges?
When sanding leather edges, it's generally recommended to start with a coarser grit and gradually work your way to finer grits. This process is similar to sanding wood and allows you to remove larger imperfections with the coarse grit, then smooth the leather with the finer grits.
Here's a rough guideline:
1. Start with coarser sandpaper. This can help to even out any particularly rough spots.
2. After the initial sanding, move to a medium grit. This will help to further smooth out the edge.
3. Finally, finish with a fine grit for a smooth, polished edge.
Please note that the exact grits and progression you should use can depend on the specific leather you're working with and the desired finish. In some cases, you might need to experiment a bit to find the best approach. Also remember to sand lightly and evenly to prevent causing unnecessary damage to the leather.
What tool do you use to round (bevel) leather edges?
The tool used to round or bevel the edges of a leather piece is called an edge beveller or edge skiver. This tool has a sharp, semi-circular blade that's designed to cut a small bevel along the edge of the leather, removing the sharp corner and giving the edge a rounded appearance.
Edge bevellers come in different sizes, often designated by a number. The number refers to the size of the cut the tool will make. Lower numbers make a smaller cut, suitable for thinner leathers, while higher numbers make a larger cut, suitable for thicker leathers.
For very fine work, you might also use a leather skiving knife, which can give you more precise control over the rounding process. However, this requires a significant amount of skill to do well.
After the edges have been bevelled, they can be further smoothed and polished using sandpaper, burnishing tools and techniques.
